|
|
The content that makes up a DVD title is grouped into linear playback units known as Tracks. The core stream that defines each Track is its video stream, which can be motion video or one or more still pictures. A Track can also include audio, subpicture and button highlight streams. The data that makes up these streams comes from the files of assets prepared for the project (see Preparing Assets).
Note that in an existing Track, the source file for any stream can be replaced with a different file. Select the stream by clicking it in the Track window. Then click the browse button (“...”) next to the filepath field at bottom. This brings up the Select File dialog, which you can use to change the source file.
This section includes the following topics:
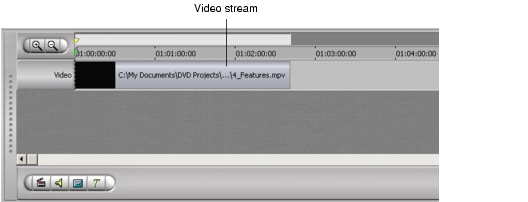
Each Track is built around a single video stream, which can be either motion video or one or more still images. See Motion Video Streams for a full discussion of motion video streams.
To bring a video asset into ReelDVD, drag the icon of the video file from the Explorer window into the Storyboard area. This creates a new Track icon (see Motion Video Streams) and places the video asset into the Track’s video stream in the Track window.
The core stream of a ReelDVD Track can be one or more still images rather than motion video. In DVD, still images are used for one of three different purposes: as backgrounds for still menus, in Still Shows and in Slide Shows. See Still Image Streams for a full discussion of still image streams, including Still Show and Slide Show definitions.
Still Shows, Slide Shows and Menus are each created by dropping a still image source file (see Still Image Streams for supported file formats) into the Storyboard area. A dialog box asks which type of Track you want to create: Still Menu, Still Show, or Slide Show.
While Still Menus are based on a single still image (the menu backdrop), Still Show and Slide Show Tracks generally contain multiple images. After the Track is created, additional images are added by dragging source file icons from the Explorer window directly into the Track’s video stream. The images will appear in the video stream in the order that they are imported. Once the images are in the stream, however, their order can be modified by dragging.
By default, each still image in a Slide Show is set to display for 10 seconds (Still Show images have no defined duration). You can change an image’s duration by dragging the end of the image’s thumbnail in the stream. For greater precision, durations can also be set by selecting the thumbnail and entering values in the start time and duration attribute fields at the bottom of the Track Editor. The start times of the next or previous slide images will be adjusted automatically.
To import a layered Photoshop file, drag the file’s icon from the Explorer window into the Storyboard area. A prompt will appear asking what type of still Track you want to create. Choose “Still Menu with Sub-picture” or “Slide Show with Sub-picture” (which will allows you to create a menu that includes audio). The Select Layers dialog will appear when you click OK. See Select Layers Dialog for information on the specific elements and usage of the Select Layers dialog.
The bottom-most visible layer in the Select Layers dialog box will correspond to button #1 in the menu. In a DVD menu, button #1 is the default button selected when first entering a menu. In addition to creating button hotspots, ReelDVD will also define standard links between the button hotspots based on their location with respect to one another. These hotspots and links can be subsequently modified in the Preview window, just as any other menu’s buttons.
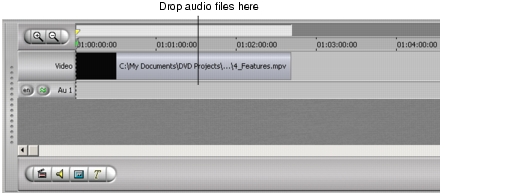
ReelDVD supports up to eight streams of audio per Track. See Audio Streams for a full discussion of audio streams, including the rules governing audio usage, synchronizing audio with video, and setting audio languages.
ReelDVD can automatically assign a stream number to each audio asset as it is added to the Track. You may want, however, to control the stream number to which a given source file is assigned. That’s because the audio of a given stream number (1–8) in a project must be the same format and language across all Tracks in the project (see Audio Rules).
Once an audio asset is assigned to a stream, you cannot change its stream number by dragging and dropping it from one stream to another. You can, however, remove (clear) the asset from its current stream. And you can change the source file for any stream by selecting the stream and then clicking the browse button (“...”) to bring up the Select File dialog.
Multiple audio clips can be imported and assembled into a single audio stream (drag the icon of each source file from the Explorer window onto the stream). However, there can be no empty spaces between the audio clips in the stream. The duration of an individual clip in the stream can be trimmed by dragging on the edges of the clip’s segment in the stream’s display in the Track window.
ReelDVD assigns each audio stream a language code as it is created. The language code for a given stream can be changed with the Language button (see Audio Languages). The default language code assigned to new streams by ReelDVD can be changed on the Languages tab of the Project Settings dialog (see Languages Tab).
ReelDVD has the capability to automatically sync audio files to video timecode as the audio is imported, if the audio file contains timecode information that overlaps with that of the video. See Sync with Video for more information on synchronization.
As described earlier, ReelDVD supports up to 32 streams of subpictures per Track. Each subpicture is categorized as one of three specific types: Menu, Simple and Infinite. Menu subpictures are used for menu button highlights, while Simple and Infinite subpictures are used for subtitles. See Subpicture Streams for a full description of subpictures and subpicture types.
Subpictures can be imported into ReelDVD as individual files or in a batch using a subtitle script. Subtitles (but not menu subpictures) can also be created directly within ReelDVD using the built-in subtitle generator (see Create Subtitle Dialog).
ReelDVD can automatically assign a stream number to each subpicture asset as it is imported into the Track. You may want, however, to control the stream number to which a given source file is assigned. That’s because the subpictures of a given stream number (1–32) in a project must be assigned the same language code across all Tracks in the project (see Subtitle Languages).
Once a subpicture asset is assigned to a stream, you cannot change its stream number by dragging and dropping it from one stream to another. You can, however, remove (clear) the asset from its current stream. And you can change the source file for any stream by selecting the stream and then clicking the browse button (“...”) to bring up the Select File dialog.
For subtitles, multiple subpicture images can be imported and assembled into a single subtitle stream. Subtitle import can be manual, or in a batch using a subtitle script (see Importing a Series of Subtitles). In general, when more than a few subtitles are involved, it is more efficient to import subtitles in a batch.
When a subpicture stream is first created using the manual import method, the type of the first subpicture added will always default to Menu. If a new subpicture is subsequently added to that subpicture stream, the type of the original subpicture changes to Infinite, and the type of the new picture defaults to Simple. Alternatively, you can select the first subpicture in the Track window and then change it to Simple or Infinite using the drop-down menu at the bottom right. The duration of an individual subtitle in the stream can be trimmed by dragging on the edges of the subtitle’s segment in the subpicture stream.
ReelDVD can import a series of subpicture images using a subtitle script (.sst) file. The preparation of subtitles for import as part of a series is described in Subtitle Assets.
To import the images referred to in a subtitle script file, drag the script file from the Explorer window onto the Track in the Storyboard area for which the subtitles have been prepared.
Note that if the actual path to the folder containing the subtitle images is different from the path indicated in the subtitle script file, ReelDVD will not be able to locate the subtitle folder. Edit the directory path value in the subtitle script file to set the correct path.
|
Sonic Solutions/ Voice: 415.893.8000 Fax: 415.893.8008 info@sonic.com |